Welcome to my studio projects portfolio – Part 2
Collaborative Class Quilt
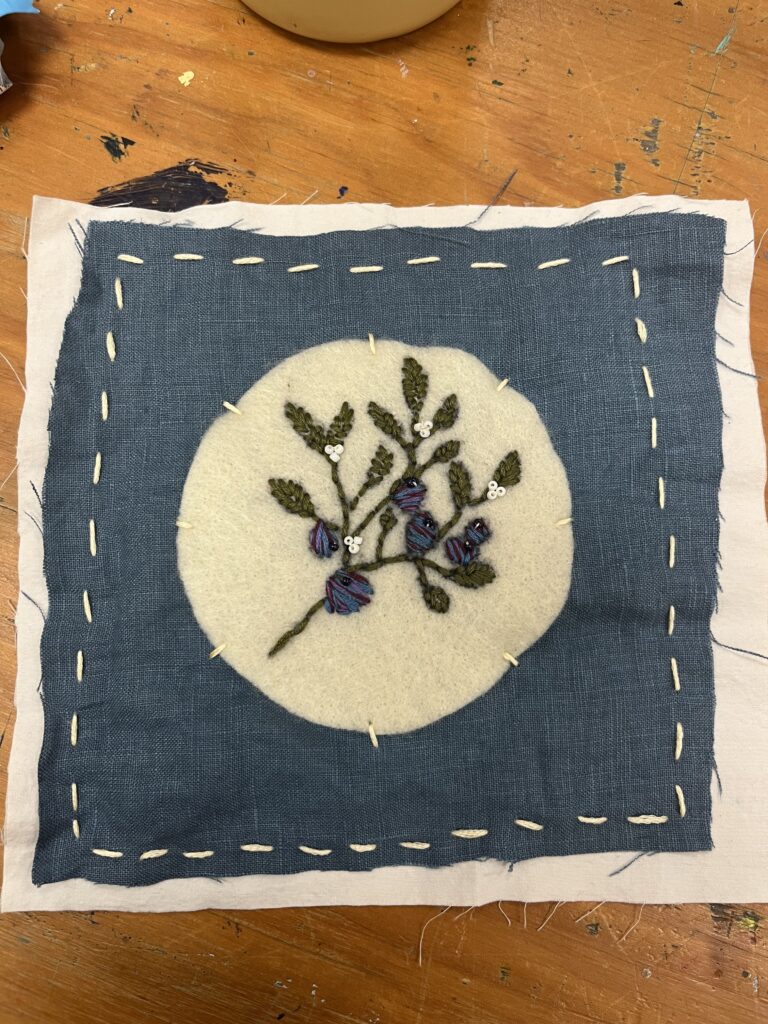
Artist Statement: One Bloom in the Quilt
I chose to entitle this piece One Bloom in the Quilt as it reflects the beauty of individual contribution within a shared creation. My embroidered saskatoon berry represents growth, resilience, and a deep sense of place rooted in a landscape. Though it is only one square, it carries its own story, carefully stitched, shaped by hand, and grounded in nature.
This piece is especially personal to me. I grew up visiting my paternal grandparents’ farm in Saskatchewan every summer, where we spent hours together picking saskatoon berries and making lasting memories. My maternal grandmother taught me how to embroider, passing down not only a skill but also patience, care, and creativity. This square brings those two parts of my life together. It reflects not only a shared class creation, but also the lessons, traditions, and love passed down by the people who mean the most to me.
Like a single bloom in a larger field, this piece becomes part of something greater when joined with others. Together, our squares form a quilt that celebrates community, creativity, and the power of many small contributions coming together to create something whole. I truly enjoyed every part of this process and feel inspired to bring a similar collaborative project into my own classroom one day.
Self-Assessment: Complete
- Intentional use of space – Yes
- Multiple materials (2+) – Yes
- Your element, represented with the context of your local forest ecosystem – Yes
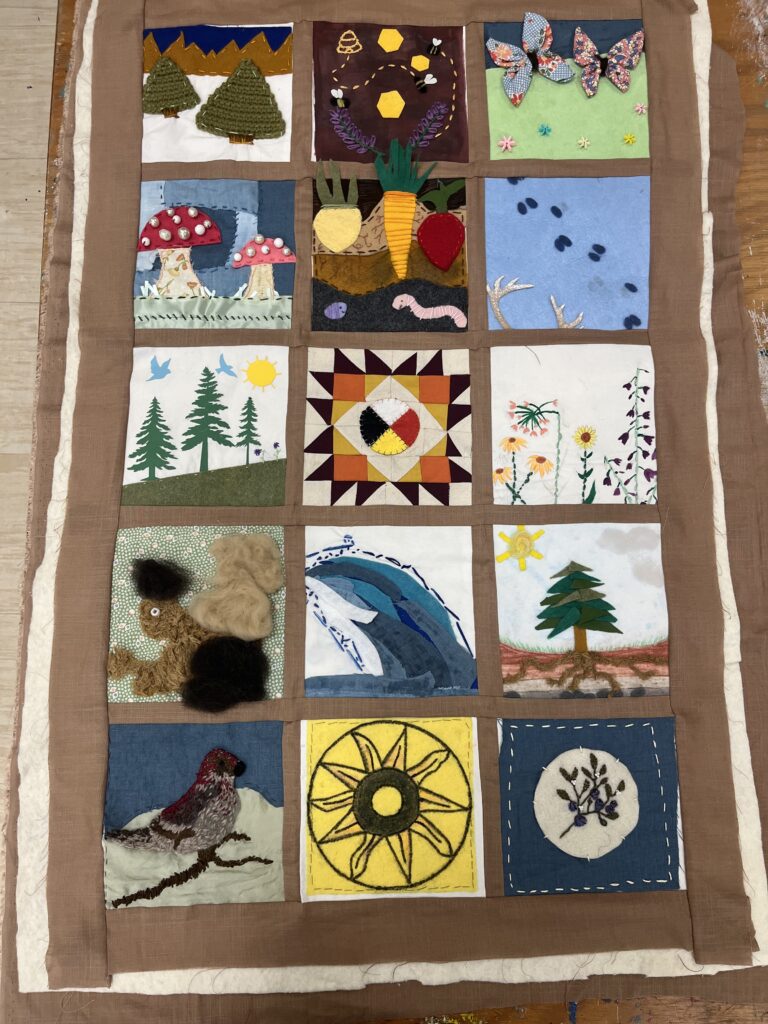
Final Product
Cardboard Loom Weaving
Supplies needed:
- cardboard (9×11 inches)
- scissors
- cotton twine
- yarn
- safety pin/paperclip
Stage 1: Build your Loom
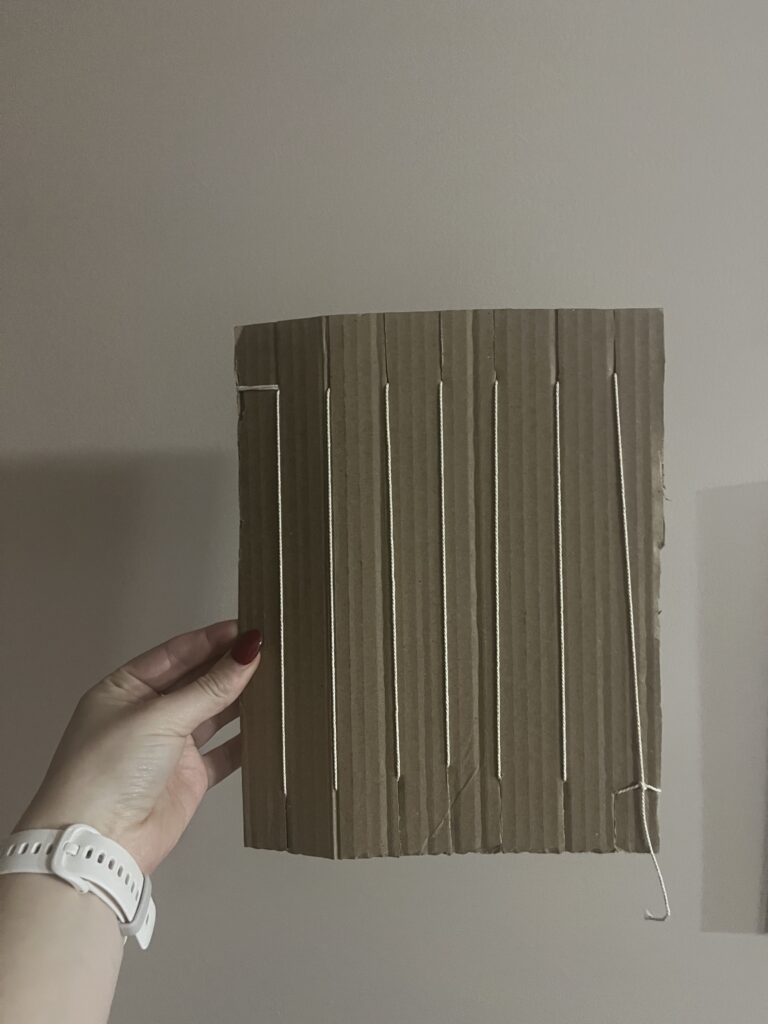
Cut out a piece of cardboard that measures 9×11 inches and create slits on the top and bottom (same number on each side – even number is preferable)
Tie one end of your cotton twine on the top. Next, wrap your string around the first knob, so it goes up and down moving left to right (enure youre wrapping around the know – it shouldn’t be going “up and down” on the back). Tie it off on the right side.
Stage 2: Weaving
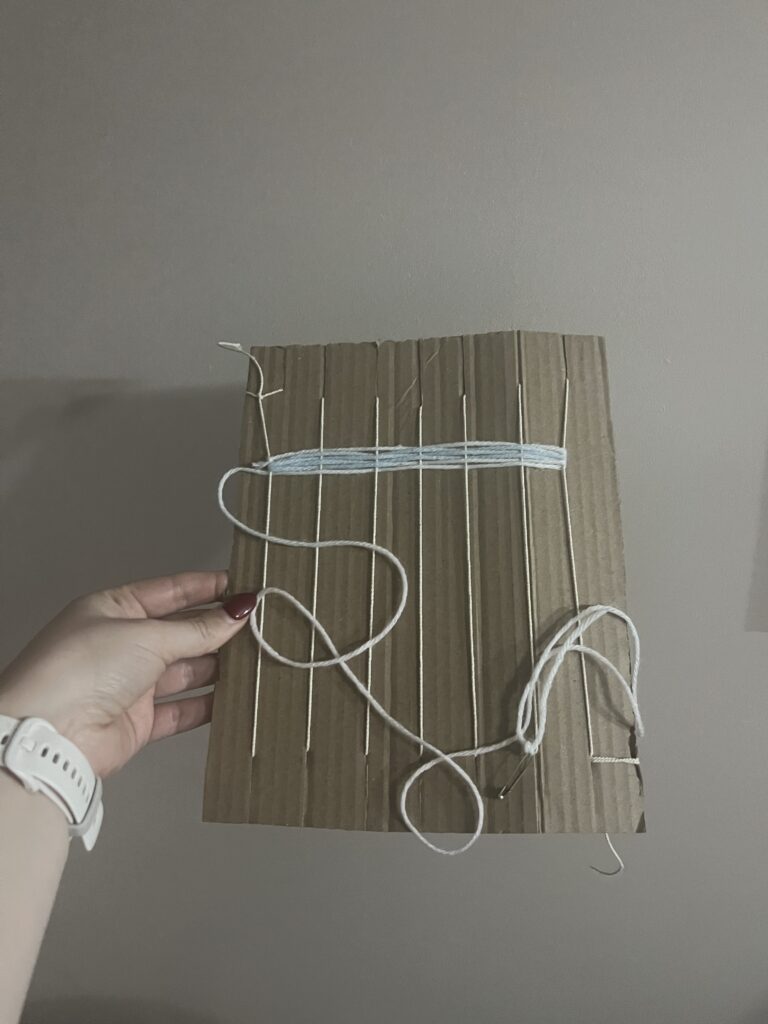
Now that your loom is set up, you can begin weaving! Start by cutting off a long piece of yarn and tying one end of your preferred style of yarn to the end of the safety pin, and the other to the first string in the loom (see visual). To begin weaving, it’s important to start low so you have room to tie the loom strings together once your product is complete. Also, please note that it doesn’t matter if you go over or under first, but that whatever you choose the next move is the opposite. For example, I started by going under the second string first. Once I got to the end, I ended on over, so going back the other way I would’ve gone under that last string so that is wraps around securely and wont come undone.
Continue this process. If/when you need more yarn, just complete the first part of this stage.
Stage 3: Securing
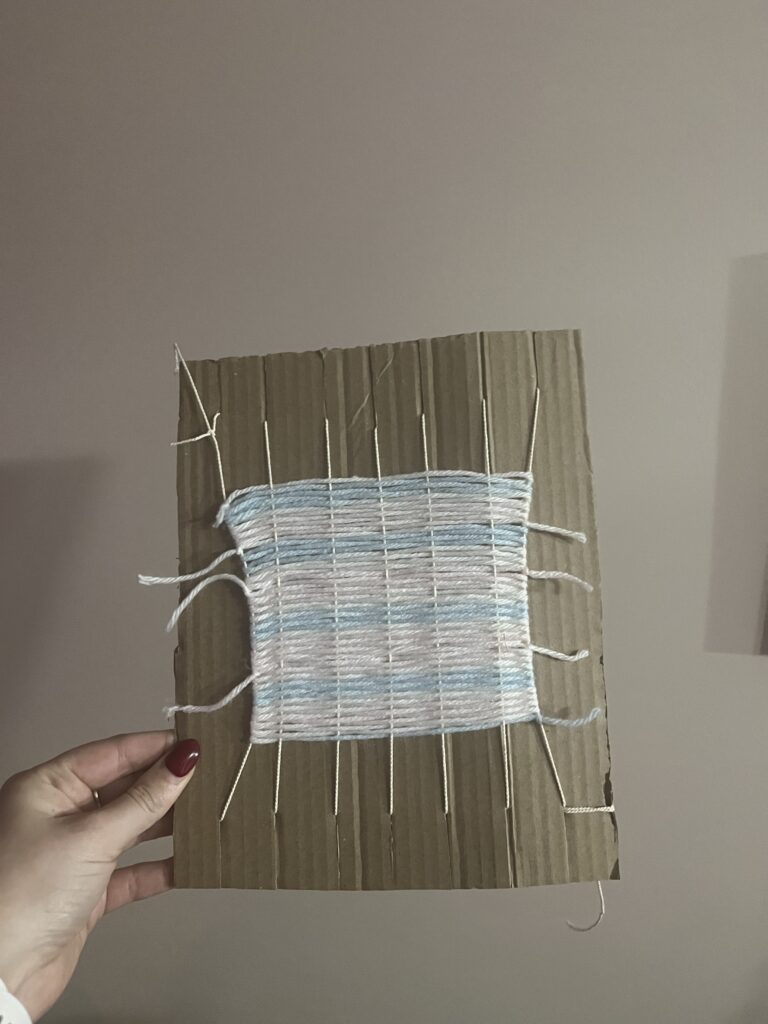
Now that you have completed the weaving stage, it’s time to ensure your product is secure and useable. Flip your loom around and cut the cotton twine so that that are long enough to tie together. After doing so, tie the cotton twine on the left outside to the one beside it. Next tie the third twine string to the fourth string in. continue until no twine is left untied (this is why even number is important).
Do as follows on the bottom as well.
Stage 4: Final Product
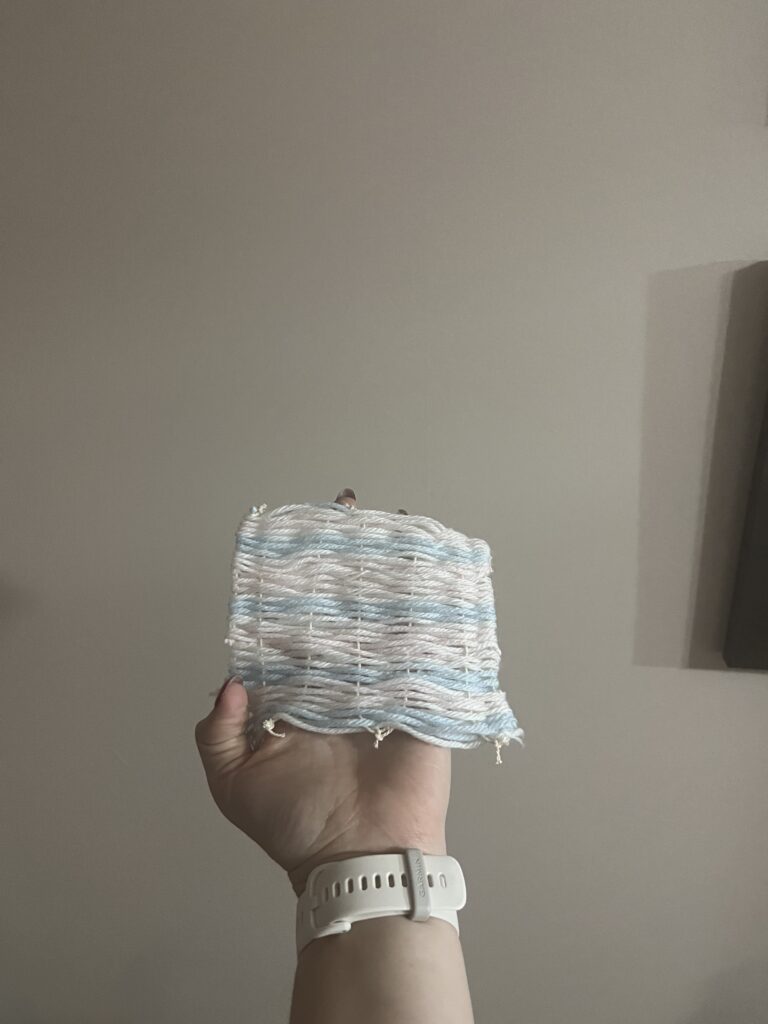
The final product!! Now you have a beautiful loom/weaving creation. This is a fun and engaging activity you can complete with students with very little supplies needed.
Extension: You can use branches, googly eyes, jewels, feathers etc. to create fun and engaging creatures.
Self-assessment Checklist: Complete
- At least 6 inches long – Yes
- Thread tension is correct – Yes
- Loose ends are trimmed neatly – Yes
- Work was removed carefully from the loom, warp threads pulled tightly and neatly – Yes
Artist Statement: Woven Renewal
I chose to title this piece Woven Renewal to reflect the sustainable nature of the project. I love the idea that something already lying around at home can be transformed into something meaningful and beautiful. The tutorial provided by our instructor was clear and easy to follow, which made the process run smoothly. Once everything was set up, I found the experience surprisingly peaceful and grounding.
I am passionate about repurposing materials and making the most of what is already available. I often find creative new uses for items around my own home, and this project further strengthened that mindset. Because of this experience, I feel confident in my ability to design fun, engaging, and sustainable art projects for my future students.
Monochromatic Painting
Objective: Find one colour and make different shades and tints using white and black to create a monochromatic landscape that provides an illusion of depth.
Supplies Needed:
- Canvas
- Paintbrush
- Paint (1 color, white and black)
Step 1: Lightly sketch out your illusion on the canvas. Ensure you have at least 5 sections (for your nature hue, two shades and two tints).
Step 2: Choose your colour and mix your light tints with white and darker shades with black.
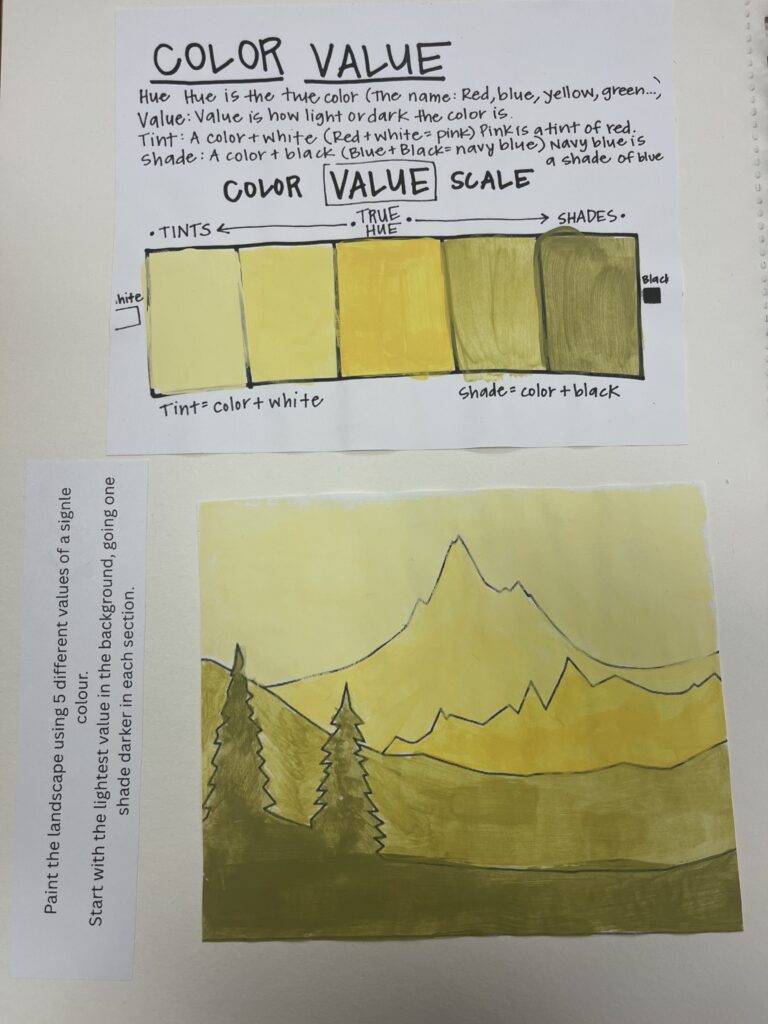
Step 3: Begin painting. (Pro tip: start with your lighter tints at the back and work your way to the front with your darker shades)
Step 4: Use even brush strokes to ensure everything looks smooth.
The Final Product:
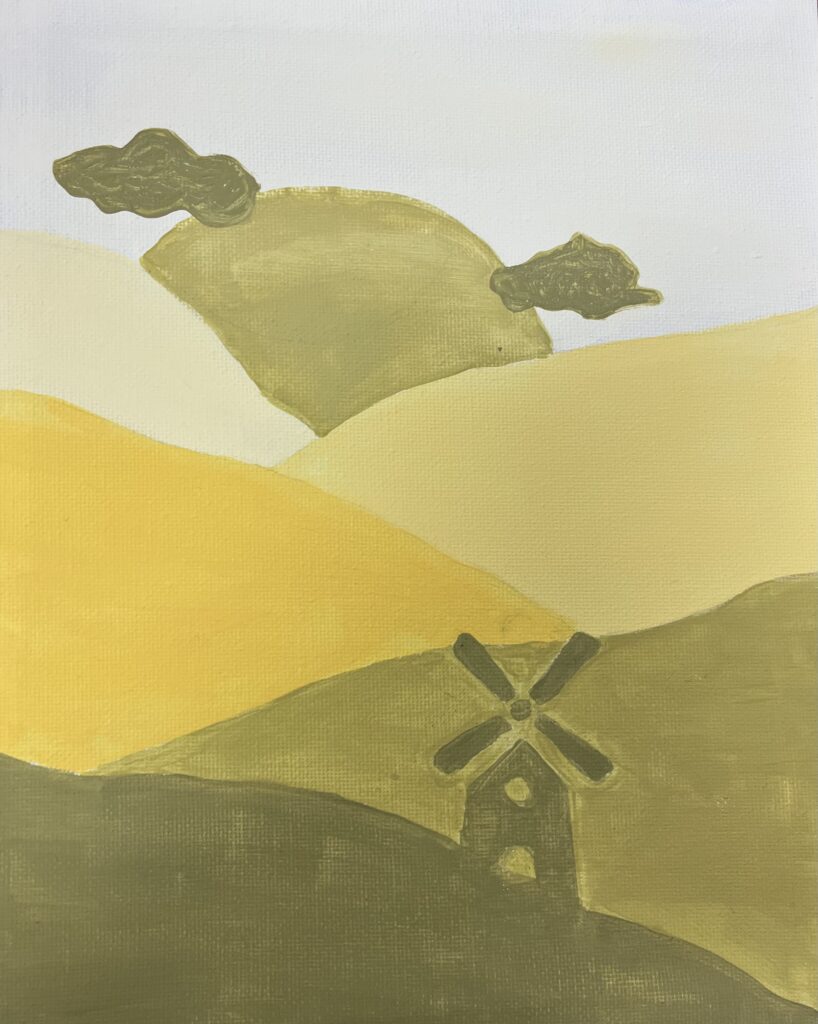
Artist Statement: Fields of Yellow
This monochromatic landscape illusion is all about color and experimentation. I chose yellow as my natural color simply because it’s my favorite. It makes me feel warm, bright, and full of energy. Limiting myself to one color pushed me to explore different shades and tints, which helped create the illusion of rolling hills and depth.
Before painting, I decided to add a hand-drawn windmill at the bottom because the hills reminded me of my summers growing up in Saskatchewan…which is where the title Fields of Yellow comes from. The open landscapes there always felt endless and peaceful. This piece blends imagination with personal memory, all brought together through one bold color.
After completing my work, I found a similar painting by another artist on Pinterest. Seeing it actually made me feel proud. Even though mine may not be as polished, I think it still captures something special and reflects my own creativity and growth as an artist.
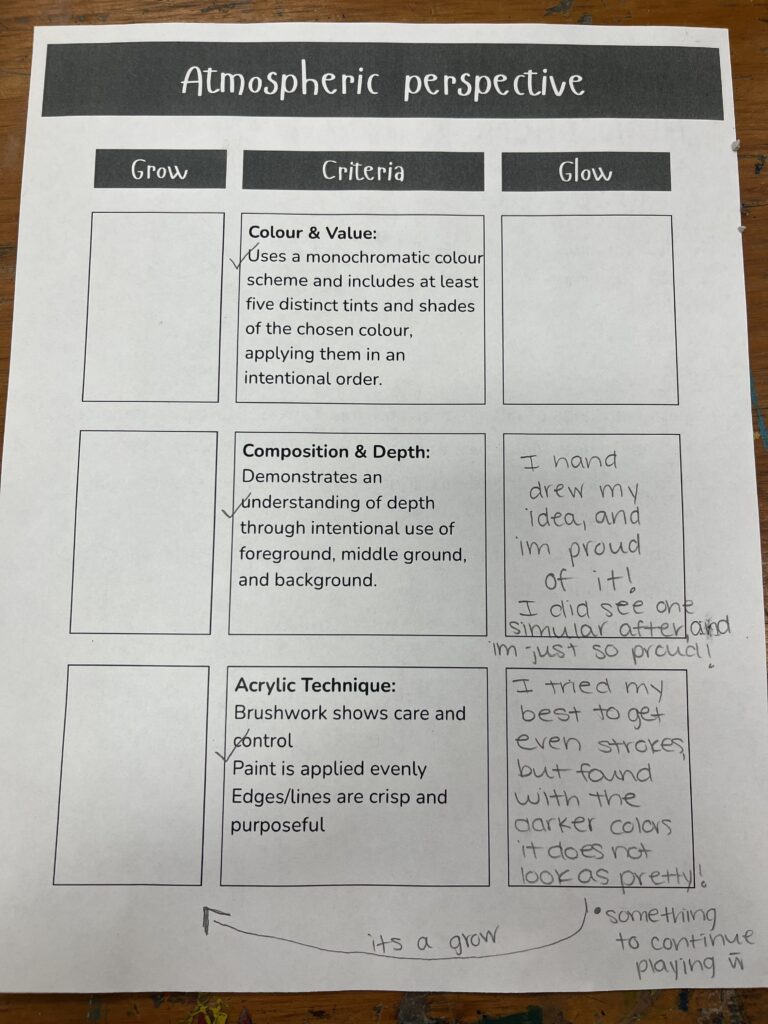
Self-Assessment: Complete
Three-Image photographic series
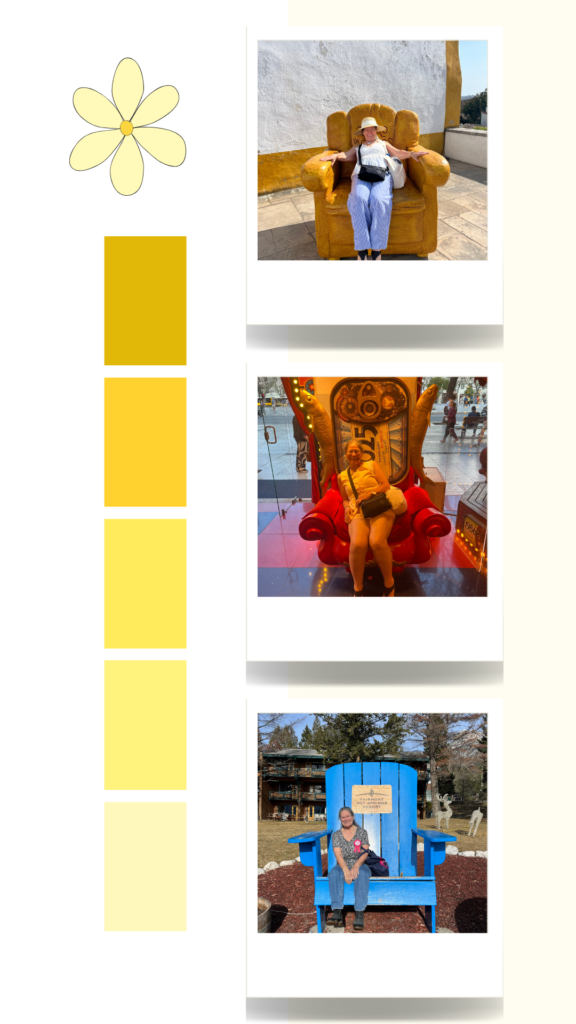
Artist Statement: Seats along the way
This photo series is about my grandma (my best friend and favorite travel buddy) sitting in chairs that are way too big for her. The photos were taken in three places we’ve traveled together: Portugal, Italy, and Radium, BC. In each image, the oversized chair makes her look even smaller in the frame, which kind of highlights both her presence and the huge world we’ve been exploring together.
The chairs weren’t planned, but they started to feel like little markers of our trip. They’re just normal chairs, but they became spots where we paused, talked, and spent time together. There’s a bit of visual humor in how big they are compared to her, but they also hold really meaningful moments. Even though the locations change, the constant is her, sitting, waiting, laughing, and making memories with me.
The series is really about the bond we share and what it’s like traveling across the world with someone who feels like home. By placing my grandma in these oversized spaces, the photos highlight her warmth and quiet strength. In the end, the images aren’t really about the places we went, but about the person who made the journey special.
Sorry, but comments are not enabled on this site.